I finished another project!!
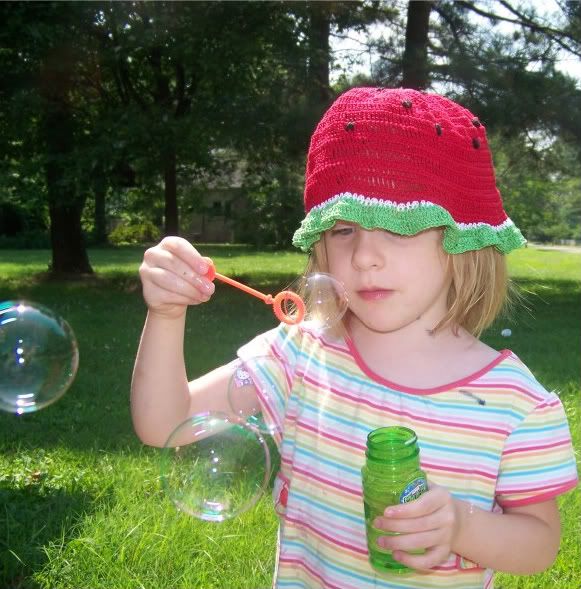
Here's a crocheted watermelon hat I made for my little girl:
Wednesday, June 24, 2009
Friday, June 19, 2009
Ugly Quilt contest
Oh, the things you stumble upon on the internet!
Doesn't everybody have a quilt that just didn't go the way you wanted it to? Maybe it was your first quilt, the one that you learned all the "rules" on..Maybe you've hidden that thing in a closet too embarrassed to hang it on a wall.
It's time to trot out that that trainweck and put it to good use! Get a good pic of that sucker, and enter it in "What was I thinking?" The Ugly Quilt Contest . Let's have a good laugh, learn from our mistakes, and maybe win a sweet prize for your uh..creation.
Here's the quilt I entered
If you enter one, let me know in the comments!
Wednesday, June 17, 2009
Stained Glass Quilt
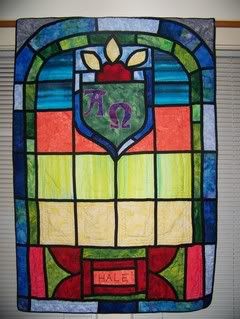
Another UFO done! I know it wasn't on my list of UFOs but, well, I have a lot of UFOs laying around. This is my Mother's Christmas Present. Yes, I mean last Christmas. Yes, I know it is June. Technically it was all finished a few months ago ( but not before Christmas), but I decided to add a quilt label on the back.
I got the idea for this quilt from a church in Grayson County Virginia. My Mother does a lot of genealogy research, and tracked down a slew of our Ancestors in that county. There is a pretty little church there, with beautiful stained glass windows, and a few of the windows had our ancestors name's on them.
I started with a foundation fabric, and sketched out the lines of the pieces, and sewed blocks onto the foundation:
Then I added bias tape for the leading:
It was hard to quilt on my machine, and next time I will hire that part out. It was the first stained Glass project I've done, and I'd really like to do more. Overall I was pleased with it. And it's for my mother, so I'm sure she'll like it. Your mother has to like your artwork, it's some sort of rule.
I got the idea for this quilt from a church in Grayson County Virginia. My Mother does a lot of genealogy research, and tracked down a slew of our Ancestors in that county. There is a pretty little church there, with beautiful stained glass windows, and a few of the windows had our ancestors name's on them.
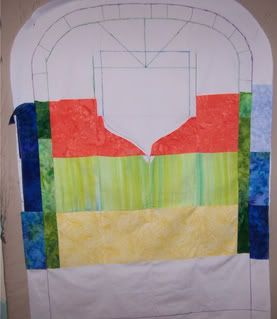
I started with a foundation fabric, and sketched out the lines of the pieces, and sewed blocks onto the foundation:
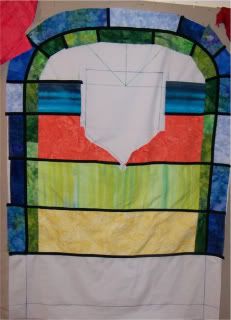
Then I added bias tape for the leading:
It was hard to quilt on my machine, and next time I will hire that part out. It was the first stained Glass project I've done, and I'd really like to do more. Overall I was pleased with it. And it's for my mother, so I'm sure she'll like it. Your mother has to like your artwork, it's some sort of rule.
Saturday, June 13, 2009
Quilt Qua
I came across this wonderful new Quilting site recently :
Quilt Qua
Oh my , what a lot of resources.. My favorite is the Giveaway page, several contests and giveaways just for quilters!
There is a page of Quilt blog links, to find other quilters; a page to find Quilt shops and museums across the US, and plenty of useful articles.
Right now there is a giveaway for a lovely Holly Taylor Fat Quarter bundle for telling a friend about the site!
UFO for the summer
I always have several projects going at once, and The very reason I blog is that I hope to push myself into actually finishing all the things I start. Here's the latest round of UFO's ( besides the feedsack quilt and the Rug below) but Hey, I did finish the Silk Tie dress, so that counts, right?
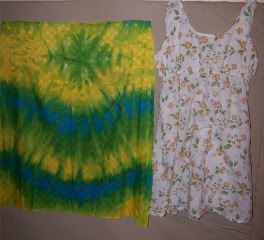
This dress is very comfy, and I wear it around the house because it just feels good on. But I really don't like the flowery print, and I want to make it a bit longer, so I thought I'd try to copy it in a bright happy loud tie dye fabric. I have the skirt cut out..
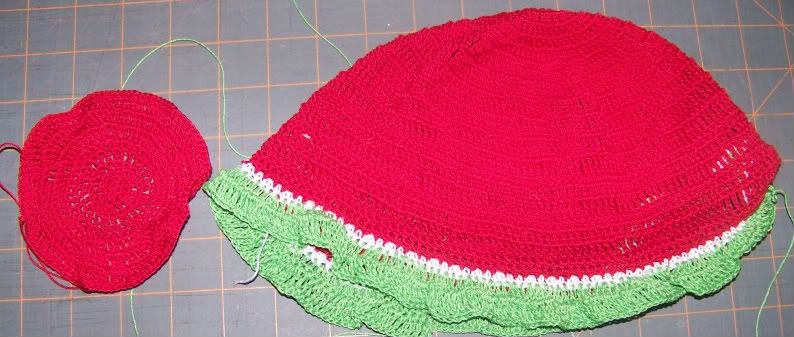
I saw a really cute Watermelon hat at my favorite kids clothing store, and thought I'd try to make one for Mollie. It's a small project, I keep it in my purse and take it along to the park and work on it while the kids play.
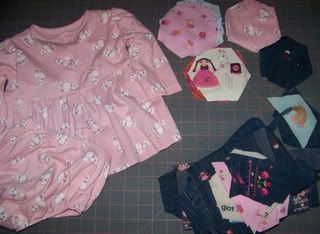
I have been hanging onto some of My daughter's clothes to make into a little quilt. Most of the pieces are knit, and I thought the pieces and patterns would look cute in a charm quilt, with hexagons. I don't really sew a lot with knits, so this may very well be a disaster, but at least it will be a small disaster. I even cut some small squares for a matching Dolly quilt.
Recycling T Shirts 1 : a rug
This projects started as a swap for some fabric with a friend. She wanted a rug, and I wanted her stash..So I learned to make a rug.
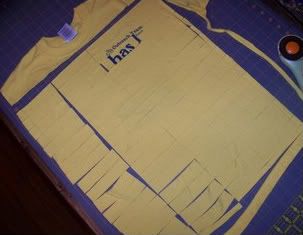
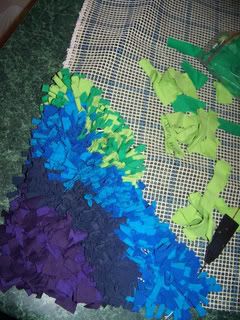
I started with a pile of old t shirts in bright colors, washed and dried them,and used a rotary cutter to cut into strips about an inch wide and 4 inches long:
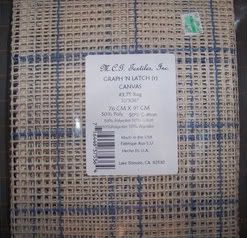
I cut up several shirts at a time, and sorted into bags by color. I used the mesh that is used for making latch hook rugs as the base:
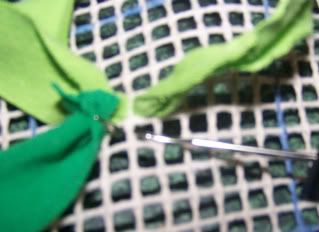
And used a latch hook tool to pull one end of a strip of fabric through the mesh
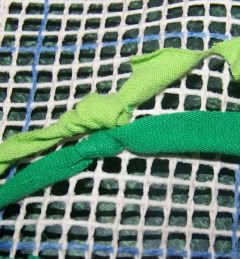
And then tied a knot
Trial and error proved that I didn't need to put a knot in every row, I did two rows, and skipped a row, and skipped a row diagonally as well. the t shirt material will full up space and stand straight up, giving a nice thick, fluffy rug:
Recycling silk ties 1: dress
Maybe you have a stash of silk ties in your closet, or can raid your friend's.. at worst you can buy plenty of silk ties at yard sales and thrift shops for a quarter a tie. A friend of mine made a tie skirt and I wanted to try it too.
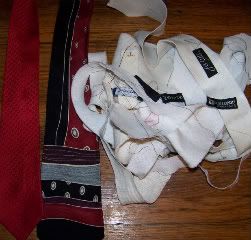
I started with a pile of 100% silk ties and gutted them. It doesn't take long to take them apart and I had no idea what was inside.
Then toss a few ties at a time the ties into the sink , handwash with cool water and a little mild detergent. Some ties might run color, so I washed like colors together. hang over the shower rod to air dry.
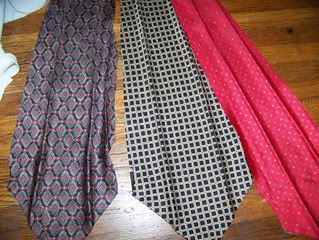
Now iron flat - I used a little spray starch too, to make it easier to handle. There is a lot more material than I thought in a tie!
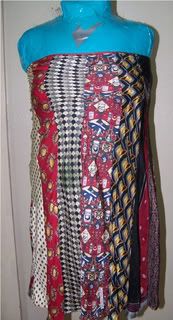
Then I just started stitching them together, starting from the widest end, (two rows of stitching to make it less likely to ravel). keep going until you have enough width to wrap around , and sew those end together. The bias cut of the ties will have enough stratch that most likely won't need to add a zipper.
I added a band around the top for a little extra stability, and cut off the bottom points of the ties and hemmed just a little bit.
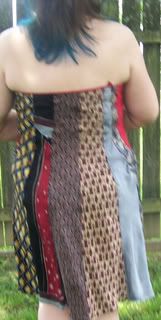
and here it is all finished: ( yes, that is a duct tape dress form)
Back view:
Subscribe to:
Posts (Atom)